Building a New Page in WordPress
It's best to watch this tutorial directly in WordPress (you'll need access, of course – if you don't have any, you can read the tutorial here).
Creating Content
A page is made up of individual blocks. This here, for example, is a "Paragraph" block, and the block above it is a "Heading" block.
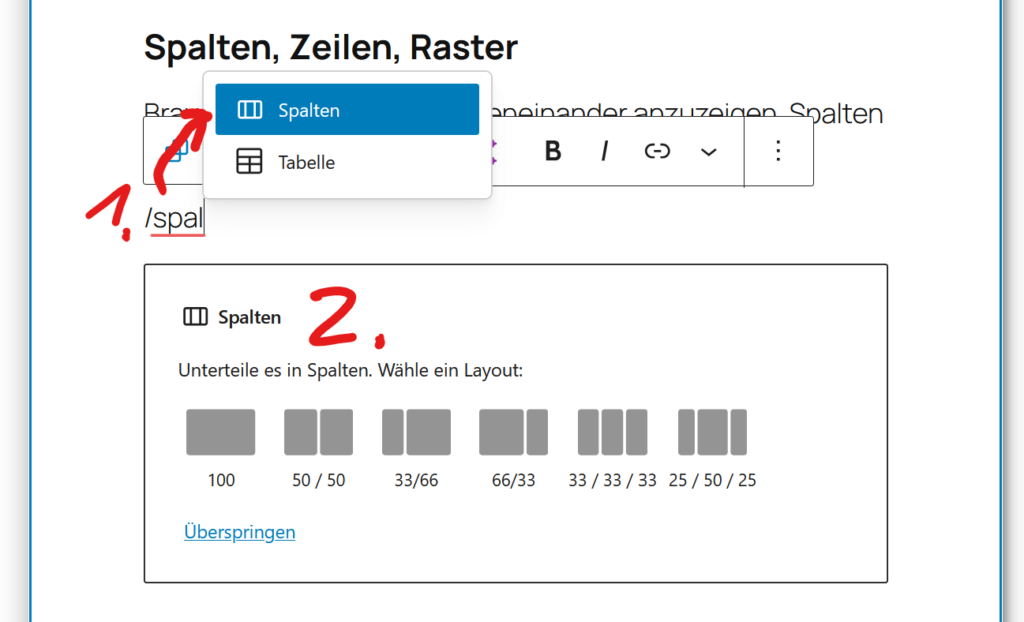
New blocks can be created using the "+" buttons. You can use the blue one in the top left, or when you hover your mouse between two blocks, or by pressing "Enter" and typing "/" in the new line.
Heading 1
Heading 2
Heading 3
Heading 1 (H1) is the page title and should only be used once per page. There's a small peculiarity here. The page title (with the color gradient) isn't displayed by default on the published website. If you want it to show, you need to insert the "Title Block" onto your page, so it appears twice in the editing mode.
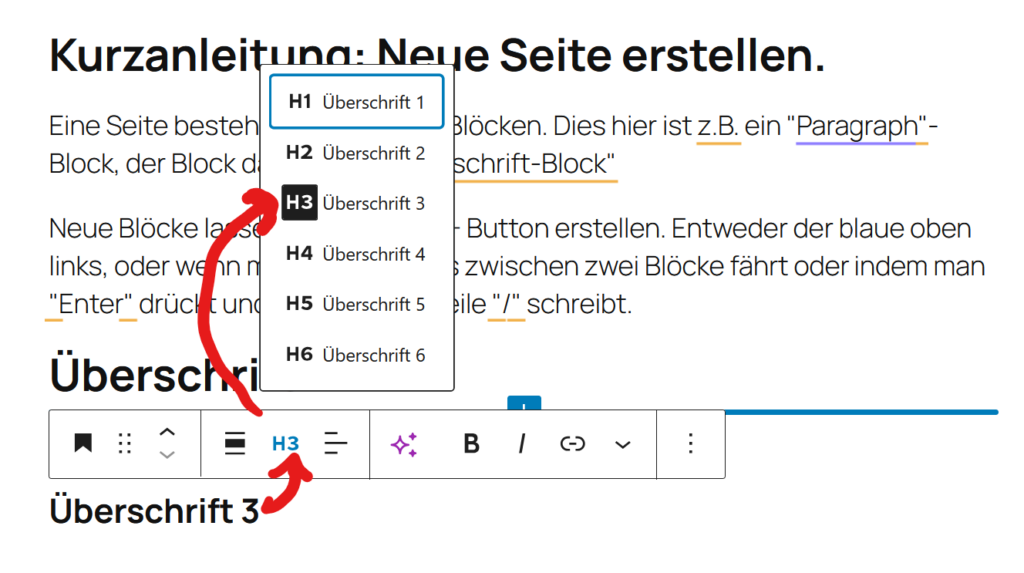
To set the heading hierarchy, click "H2" in the block menu and then select from the list, see image.
Adding Background Boxes
So that the content doesn't appear directly on the website's colored background image, we need to put all blocks into a group and give that group a background color.
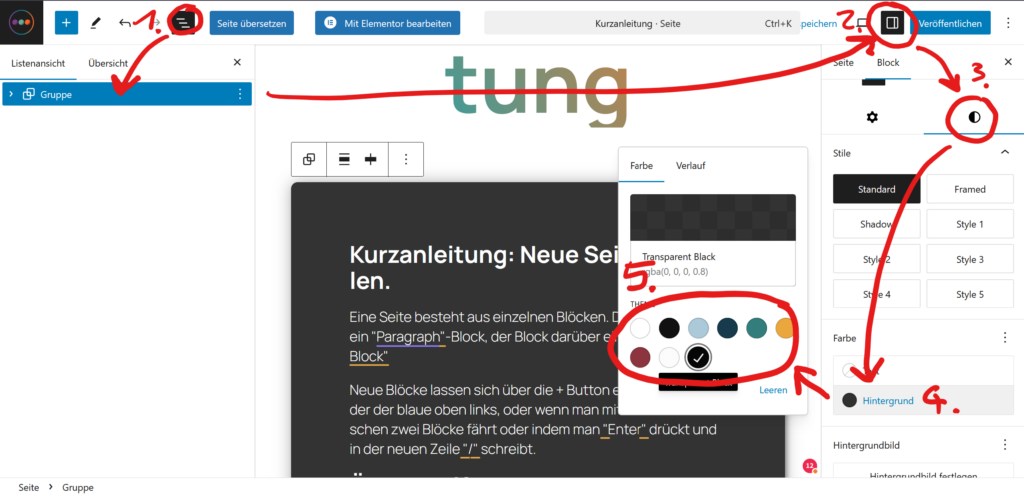
- Open the List View and select all elements, then group them (using the three dots or "Ctrl + G"). Make sure the Group is selected at the end. The List View is generally very helpful for keeping an overview, especially when blocks are nested.
- Open the Settings. Here you'll find settings for the entire page or the selected block. We need the latter.
- In the block settings, select the "Styles" tab.
- Choose "Background".
- Black and white at the end of the color palette provide the slightly transparent background typical for the site.
Design
Font colors, spacing, and special effects can also be controlled via the block settings. There are two places to look for these.
Toolbar
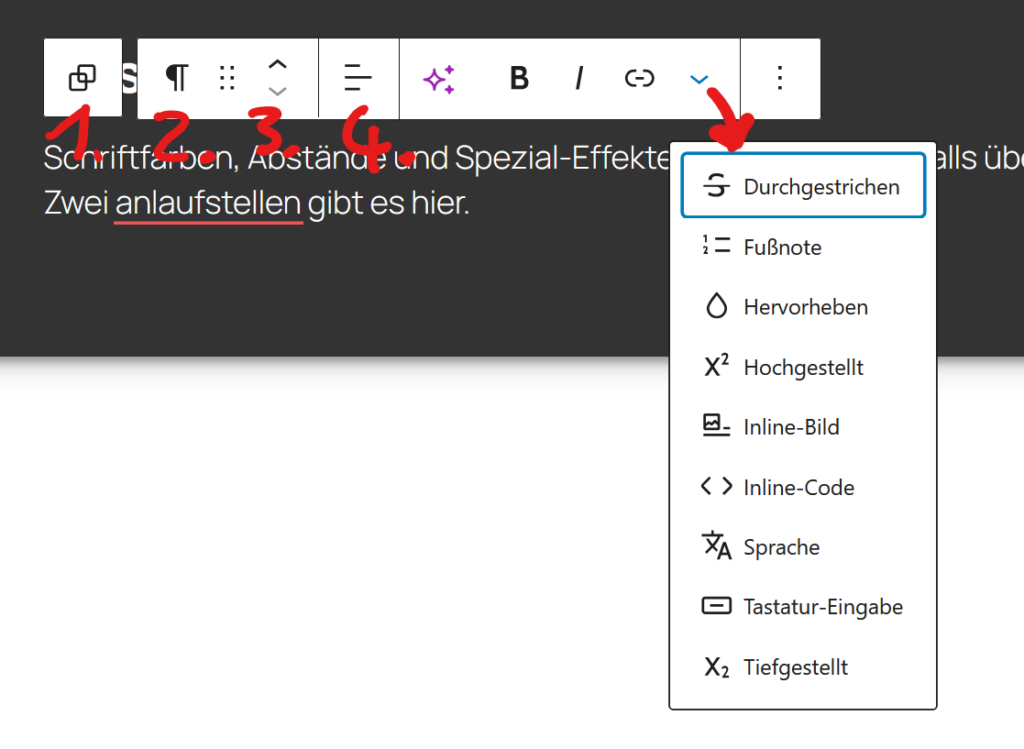
- Select the parent block.
- Displays the icon of the current block. You can also change the block type here (e.g., Paragraph to Heading).
- Move the block.
- Now come block-specific options like text alignment, links, bold text...
Styles Sidebar
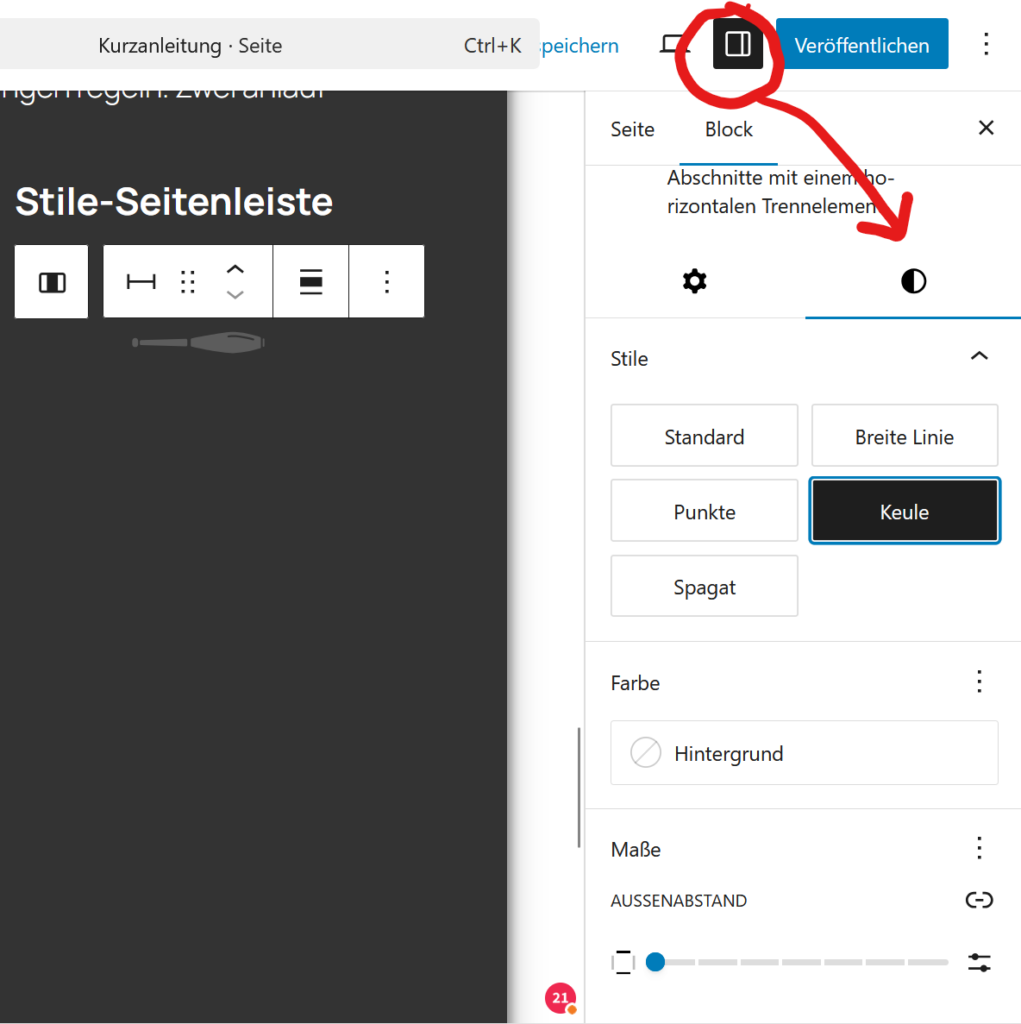
Here you can adjust text color, styles (like the club for the "Separator Block"), and spacing, among other things. The Group block, for instance, also offers options for special styles.
Tips and Tricks
Copy & Duplicate!!!
Whenever possible, copy blocks from another page and then replace the content. This way, you only have to deal with a few things. (Ctrl + C > Ctrl + V)
If you need a block multiple times, you can also duplicate it with all its content (Ctrl + Shift + D).
The List View is incredibly helpful here 
Paragraphs
Pressing Enter creates a new block each time.
To prevent this, hold down "Shift" (the capitalization key).
Help, the Block Selection is Too Big!
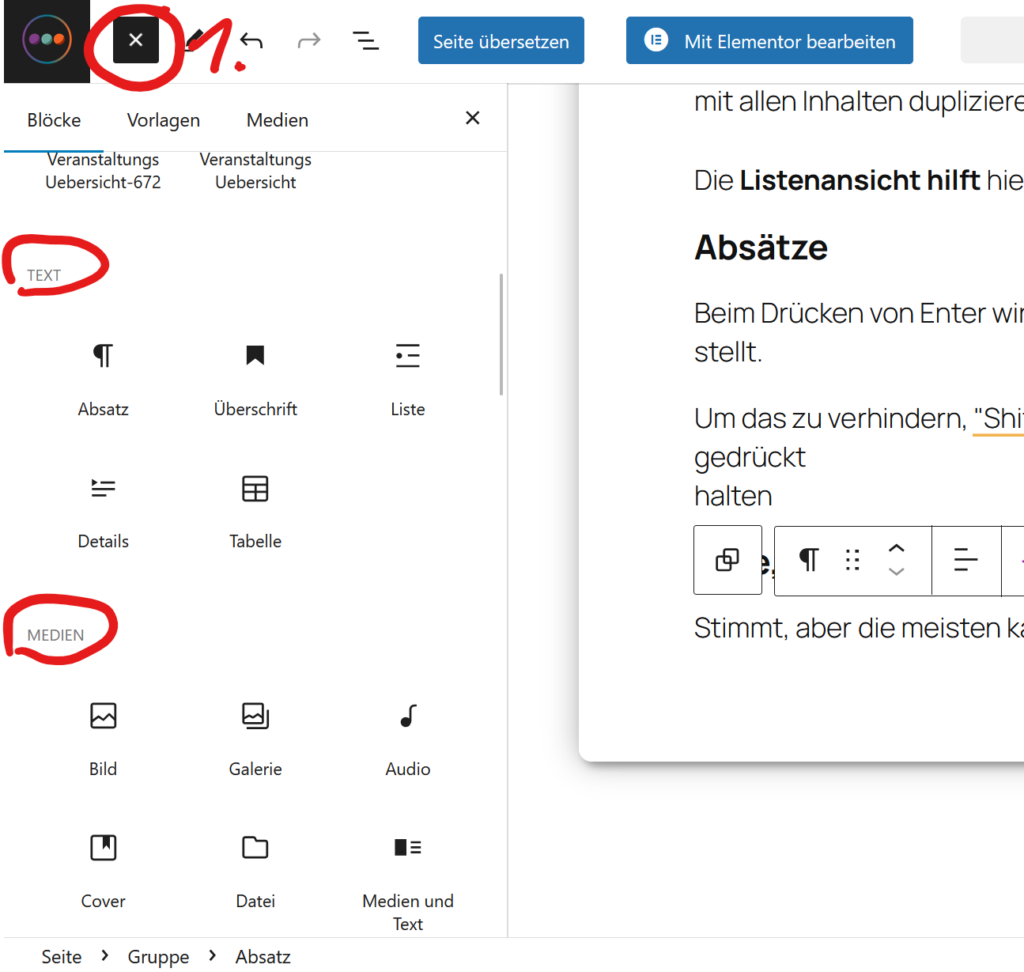
Understandable. When you open the block overview, you can get a sense of what's available. You really only need the blocks under "Text", "Media," and "Design." You can safely ignore everything else.
Columns, Rows, Grids
You need these to display content side-by-side. Columns are the easiest to use.
- Create a Columns block (you can also do this via the blue +).
- Select the layout. To move blocks into columns, the List View is again very helpful. Taking a look at the toolbar also reveals options like aligning content (top, bottom, middle...).
via "Styles," also with an outline only.
For buttons, the link is added via the link icon (or Ctrl + K).
Rows work similarly, but they don't have fixed widths. Grids are roughly comparable to dynamic tables.
Readability
No one reads a long block of text anymore [insert current year here]. Whenever it makes sense (!), use visual structuring like:
- ==Headings== in different levels (H2, H3...)
- Lists
- Bold for important parts
 Images
- Paragraphs
- Buttons instead of normal links
- Background colors for individual blocks
All clear ;)
Publishing
This is relatively easy using the corresponding button in the top right.
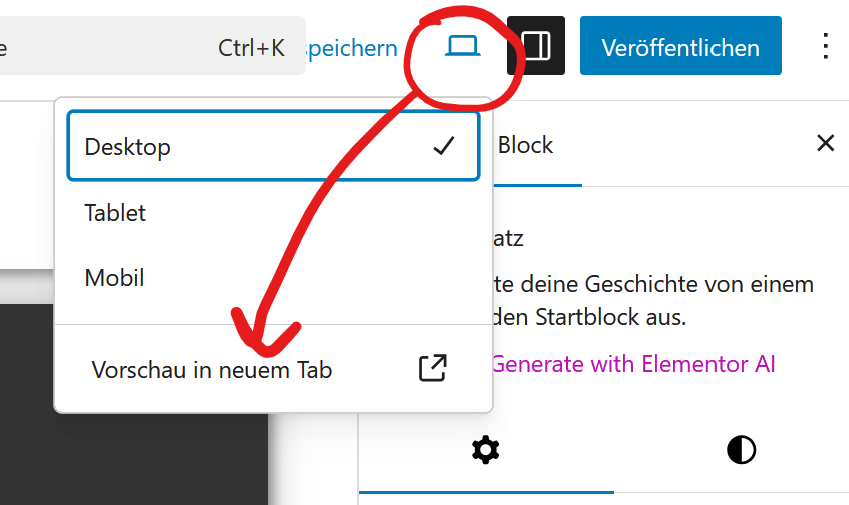
However, it's worth doing a quick check of the finished page beforehand, as the page in the editing mode doesn't always look the same as the public version.
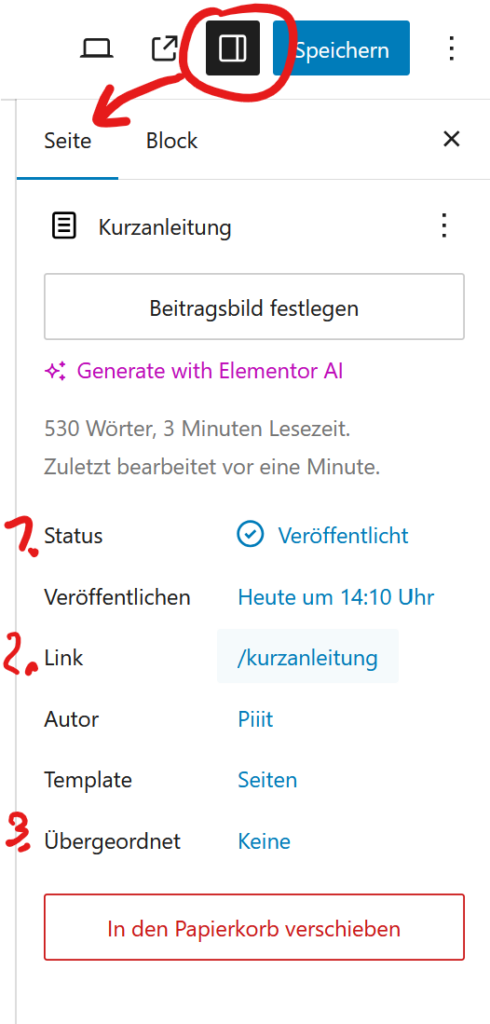
- Here you can set, for example, that a page is saved as Private or as a Draft, so you don't have to delete it to hide it.
- Here you can edit the link under which the page will eventually be displayed.
- If the page is intended to be a sub-page of another page, this option is available here.
Problems & Questions
Not everything always works as it should. Some settings, for example, may have no effect. This can have two reasons. Either it's a bug, or that setting is being overridden by the parent website display settings.
It's best to report problems of this nature, or simply ask questions, directly with a screenshot to: